
Do it Yourself - Herb Spiral
Do it Yourself - Herb Spiral
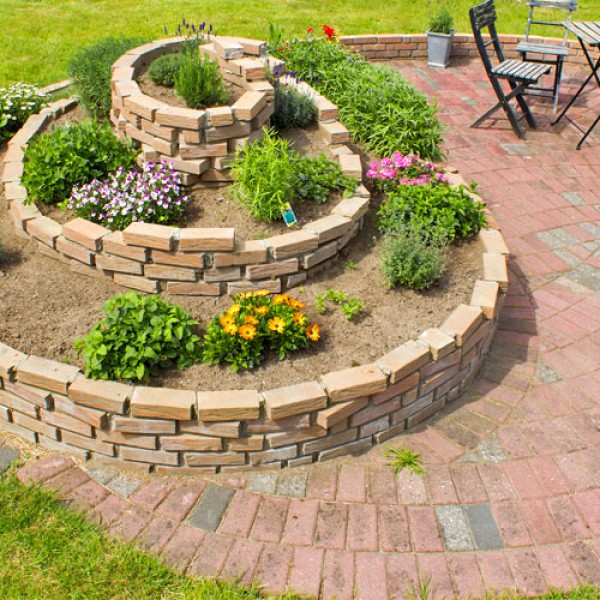
The herb spiral is a very special highlight in the garden due to its different levels and the possibility of an adjoining pond.
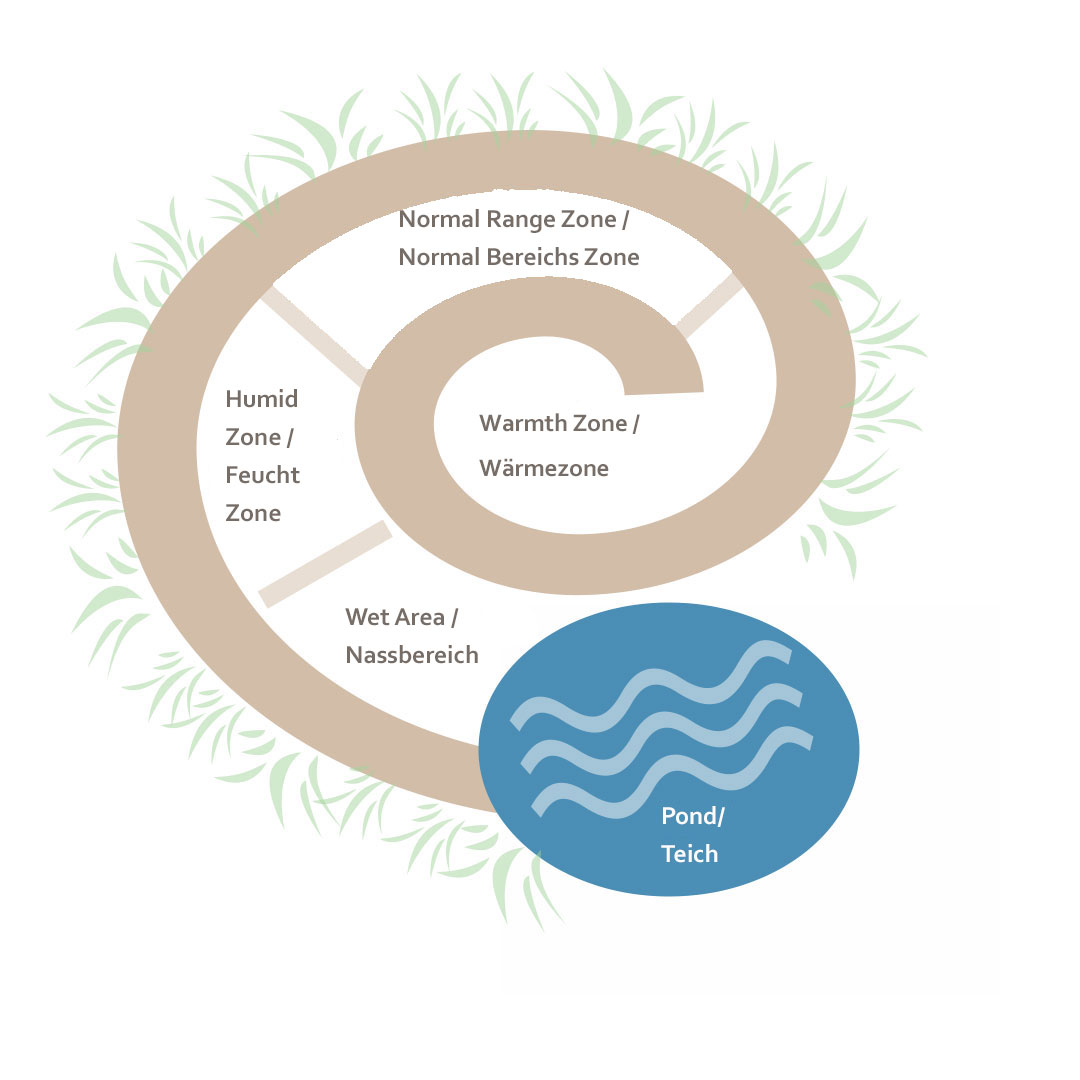
The 4 zones of a herbal spiral:
Zone 1:
The wet area is a place where moisture-loving herbs are at home. Especially water cress, water mint or similar herbs are planted in this zone.
Zone 2:
The humid zone is perfect for growing chervil, parsley, basil or wild garlic.
Zone 3:
The normal range zone, where especially herbs like chives, coriander or mint like to live.
Zone 4:
The warmth zone is the top point of the spiral which is driest. Mediterranean herbs that need a lot of sun do well here. Examples of these are sage, thyme, marjoram, rosemary, oregano, but also lavender and laurel.
What do you need to build a herb spiral?
- stakes, hammer and cord
- spade and shovel
- clinker bricks, sandstones or leftover stones to build the border
- enough sand, compost and garden soil to fill in the herb spiral
- a small prep pond, an old metal tub or a construction tub
- Coarse and medium gravel
How to build a herb spiral?
The optimal place for the herb spiral is important: the best place ist the sunniest area of the garden and should have a diameter of at least 3 metres.
The design is up to you. In the optimum location, the site must be marked out with the stakes and the cord. The stakes can be hammered in with a hammer when the soil is too dry.
Always keep the shape of the snail shell in mind when marking out the site. If a pond is planned, place it at the bottom of the spiral in the wet area and face south.
Now dig the shape of the herb sprial about 30 cm deep, the place for the pond about 40-50 cm deep, depending on the basin. You may need to loosen the soil with a spade and use a shovel to remove the soil. Once the spiral is unearthed, cover everything except the pond area with a 10 cm layer of coarse gravel. The gravel prevents later compaction and thus waterlogging.
Then you can start layering the wall. At the top, the wall should be about 80 cm high. Start right next to the pond. The stones are laid in a spiral from the outside inwards. If possible, avoid to use mortar, so that herbs can be planted in the clefts later. Insects and reptiles can also hide or sleep in the clefts.
When the wall is finished, fill medium gravel into the spiral. In the middle of the spiral, the layer should be 50 cm thick and slope downwards so that only a flat layer is left at the outer end.
When filling with soil, the zones must be considered. On the top zone, which is best for Mediterranean herbs, the garden soil should be mixed 50:50 with sand. Going deeper in the spiral, reduce the sand and mix in compost. At the bottom end of the spiral, the mixture should consist of 50 percent garden soil and 50 percent compost.
Have always the snail shell form in mind while constructing. The upper part of the spiral is the top with utmost soil in it. The amount of soil decreases towards the bottom to become relatively flat.
The last step in the construction is the installation of the pond. You can use a prefabricated pond, a construction tub or an old bathtub made of non-rotting material (but it must be covered with pond liner). Place the pond about 30 - 40 cm deep in the ground. Make sure that the hole is adjusted to the shape of the pond. First fill in 5 to 10 cm of aquarium sand or gravel and then fill it with water. To prevent the soil of the herb spiral from flowing into the pond, you can protect the edge with large stones, e.g. sandstones or pebbles.
The herb spiral should not be planted directly after construction. You should either water it well for 7 days or wait for a heavy thundershower, because the soil mixtures are still settling. If the herb spiral has lost a lot of height, it can be filled up again with the appropriate garden soil mixtures. Once the spiral has been refilled, it can be planted directly.
Which herbs are best for which Zone of the herb spiral?
Pond and Zone 1 - Wet Area
- Water nut
- Duckweed
- Reed or grasses
- American calamus
- Water Hemp
- Marsh yarrow
- Watercress
- Water mint
- Wild garlic
- Woodruff
- Blood Sorrel
- Mountain mint
Zone 2 - Humid zone
- Chives
- Parsley
- Peppermint
- Wild garlic (shady)
- Dill
- Balm
- Borage
- Chervil
- Sorrel
- Celery
- Woodruff (shady)
- Meadowsweet
- Chinese leek
Zone 3 - Normal Range Zone
- Basil
- Chamomile
- Caraway
- Marjoram
- Fennel
- Oregano
- Tarragon
- Coriander
- Lovage
- Dill
- Tea fennel
- Anise
- Balm
- Savory
- Curry herb
- Purslane
Zone 4 - Warmth Zone
- Rosemary
- Lavender
- Thyme
- Sage
- Laurel
- Olive herb
- Lemon thyme
In the spaces between:
Wall pepper, tripmadam, hanging savory
Conclusion:
If you have the space for a herb spiral in your garden, you are able to create a beautiful and fragrant environment with fresh herbs for every day. You also build a wonderful habitat for amphibians, insects and small mammals. It takes a bit of work to build a herb spiral, but the result of a delicious variety of herbs is absolutely worth it. Another great advantage: All the herb overproduction, you can dry or freeze and add to your food in winter.


 Basil Dark Opal Seeds
  Coriander Confetti Seeds
  Marjoram Pot Seeds
  Parsley Bravour Seeds
  Organic Herbs & Vegetables Spray
  Floristry Scissors
  Organic vegetable and herb fertilizer


