
Chili Cultivation Instructions
Chili Cultivation Instructions
Conditions for a successful chili cultivation
Before it starts, what do you need?
- Quality seeds (in our shop you can choose from more than 350 varieties)
- Cultivation soil, (plastic) pots, seed tray strips oder coir pellets
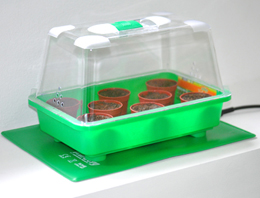
- a warm protected place to germinate the seeds, because chillies like it warm (windowsill on the south side, for particularly heat-loving species the purchase of an indoor greenhouse and a heating pad).
- lots of light
![]() Sowing
Sowing
Date: Chilis are very heat-loving and have a long ripening period (some tropical species up to 120 days), correspondingly early in the year they should be sown (depending on the variety optimal sowing date is between the end of December and the beginning of March, you will find this information for the particular varieties on our seed sites).
Germination test: You can start with a germination test. The chilli seed is not placed directly in the soil or substrate, but only germinated on slightly moist cotton wool, for example. Thus, seeds that cannot germinate can be sorted out quickly.
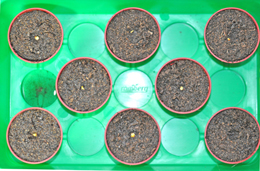
Substrate: Use a high-quality nurturing soil (germ-free, little fertilizer) or coconut pellets, in which you place the seeds approx. 0.5 - 1 cm deep and keep them constantly moist (favourable: lukewarm water!). Garden or compost soil can be removed from germs and pests in the oven at 200°C within approx. 20 minutes. If you give each seed a pot or a coir pellet, then you will not have any difficulties to seperate the delicate plants when you transplant them later.
Germination temperature: The seeds need a minimum temperature to germinate, and this should also be maintained also at night. This optimal germination temperature varies from variety to variety. With many varieties the range between 22° and 28°C is optimal, many tropical varieties like it even warmer. The exact details can be found on our homepage under the particular seed varieties.
In general: the higher the temperature (up to 32°C), the shorter the germination time.
Moisture: It is important that you keep the seeds well moist, but they must not be wet! Avoid soil wetness in the pots or the greenhouse (also condensation), otherwise mould may develop. Chilis don`t like waterlogging. There are different opinions about the type of water being used: some prefer distilled water because it contains neither chlorine nor calcium, while others swear by "normal" water from the tap. Everyone has to decide for himself and make his own experiences.
Tip: Since the different types are very similar after germination, it is helpful to label the pots immediately after sowing (e.g. with small signs or la
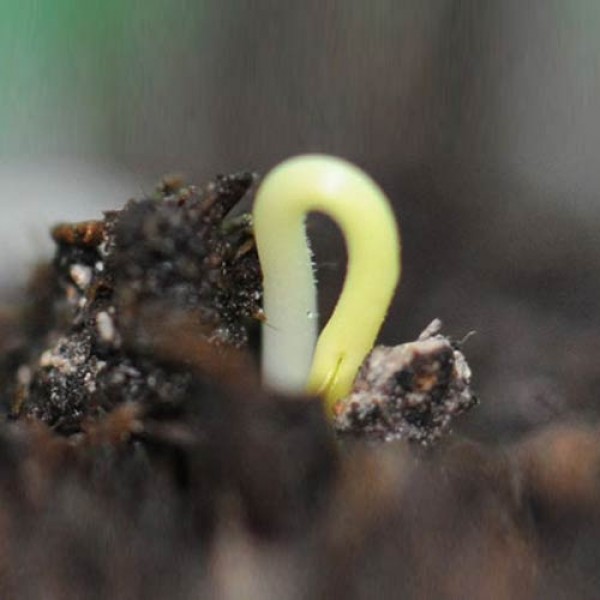
![]() Seedlings
Seedlings
Germination time: The duration between sowing and germination is usually between 7 and 14 days under optimal conditions with sufficient heat and humidity (no moisture!). If the temperature is at the lower end of the recommended scale, it can take several weeks.
Location: When the seedlings sprout, the most important thing for their further growth is sunlight. The plants should be placed at a south window or in the conservatory/greenhouse. If your seedlings do not receive enough light, you will recognize this due to the fact that they "etiolate", which means that they form thin, glassy, unstable stems, because the seedlings are trying to grow in the direction of the strongest light source. If this is not possible, you could purchase a special plant lamp from a specialist store to ensure that the plants are supplied with enough light (12 to 14 hours per day is recommended).
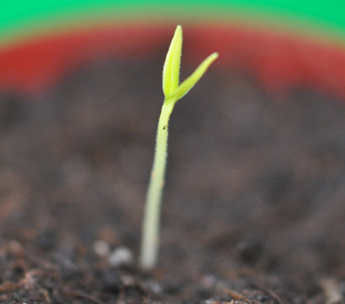
![]() Transplanting
Transplanting
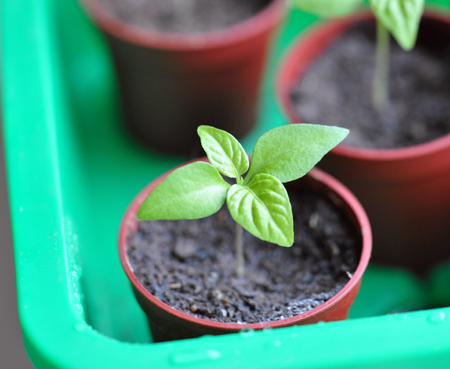
When the first real leaves appear after the cotyledons, it is time to separate (prick) the plants and transfer them into pots about 8 - 10 cm in size. Be careful, as the tender roots should not be damaged. Press a small hole in the pots filled with potting soil (e.g. with a dibber) into which the young plants are placed. Fill it up with soil and supply the plants with sufficient water, but avoid waterlogging! To ensure that the plants get enough sunlight and develop vigorously, you should place them outdoors in a sheltered, sunny place during the day when the temperature is above 12°C. But be careful: Since the plants are not yet used to direct sunlight, they can get sunburned in the sun! Therefore a half-shady place is better at the beginning. Fertilize: You can already apply some fertiliser to the plants to support strong root growth right from the start. Afterwards you should fertilize every 1 - 2 weeks. Chili Food has developed a special chili organic fertilizer Chili-Bio-Dünger for this purpose, which optimally supports the plants.
![]() Planting out
Planting out
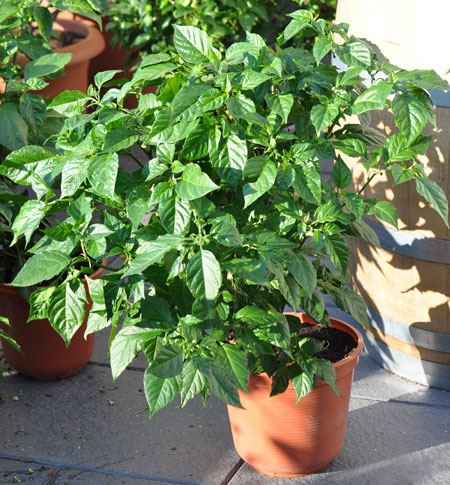
1 - 2 weeks after the last frost, the chillies can be left outside permanently. However, only a few robust varieties with a ripening period of less than 80 days are suitable for outdoor cultivation. Especially chillies with a long ripening period should be cultivated in the pot, so that you can bring them indoors in autumn and let the fruits ripen afterward. The pots must be large enough for healthy root growth (at least 8 - 10 litres pot volume).
You can avoid waterlogging if you simply cover the bottom of the pots with some granulate. Then put some potting soil into the container and embed the young plants together with the soil from the old pots, and cover with some new potting soil. If necessary, add some fertiliser and of course do not forget to water. The pots should be placed in a sunny and sheltered place, close to the house walls (south side). On an open balcony you can also construct a small windbreak out of some foil. The chili plants can tolerate direct sunlight after an adaptation period and should also receive at least half of the day`s sunlight. It is important that the plants do not dry out completely. Therefore, water from time to time and always ensure that excess water can drain off.
General care tips:
- Since chillies need a lot of warmth and sun, they grow best in a sheltered, sunny place with at least 6 hours of sunlight, better more.
- Use a high-quality soil and fertilize regularly every 1-2 weeks.
- Chilis do not like waterlogging, you should water them regularly, but not too much. To prevent waterlogging, you can place a layer of granules or pebbles at the bottom of the pots.
- You can apply a layer of mulch to reduce evaporation and protect against weeds.
- The chili`s heat can be increased if the plants suffer from a little water stress (i.e. drought) during the weeks of ripening (but be careful not to lose sight of the plants).
- To increase the harvest, you can also cut off the tips above the leaf branches from a height of 30 cm. As a result, the plant grows bushier and puts more strength into the fruits.
![]() The harvest
The harvest
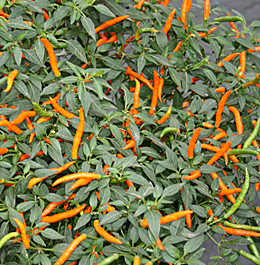
For a good flavour and intense heat, the pods should not be harvested until they have reached the optimum harvest colour. This colour can vary from type to type: from red, yellow or orange to purple, brown or black. Some strains can also be harvested and eaten when unripe and still green (see the detailed seed information for the different types on our website). Be aware that the varieties may have different ripening times. This means that certain varieties mature late to their optimal colour and thus to their typical taste. It is recommended to wait for it, even if you have to bring the plants inside and the pods are ripe not until the first snow falls outside.
You may even like to overwinter a particularly beautiful chili plant. However, some varieties such as Serrano Chili are not worth overwintering because the plants grow quickly and have a high yield. Read more on the topic of overwintering here: Overwintering chillies.
Now there should be nothing to stop you enjoying your own home-grown chillies!
We wish you a lot of fun while trying it out and hot times!
Other topics that might interest you:
Kompakte Zusammenfassung
Sehr angenehme Zusammenfassung der wichtigsten Eckdaten. Gleichzeitig ausreichend beschrieben um genug an die Hand zu geben um selber los zu legen. Meine eigene Erfahrung der letzten beiden Jahre Chili-Zucht habe ich ebenfalls wiedergefunden :)
Scheisse
Ich als Garten Anfänger, habe in der Anleitung nichts vom Bestäuben gelesen und jetzt habe ich 2m hohe Bäume aber keine Chilis dran, danke vielmals!
Tolle einfache Beschreibung
Hat mir sehr für meine erste Zucht geholfen. in den kommenden Tagen geht es wieder los :)
Hilfreich
Vielen Dank! Das hat mir geholfen.
Gute Ware, gute Beschreibung, gutes Ergebnis! Dankeschön
Gute Ware, gute Beschreibung, gutes Ergebnis! Dankeschön
Verständliche Anleitung
Sehr schöne, hilfreiche und verständliche Anleitung!
Klasse
Sehr hilfreicher Artikel.
Hat mir besonders bei meiner Zucht geholfen.
Super!
Sehr interessanter, schön erklärender Artikel!


 How to germinate chillies
  Coconut potting soil 2.5 litres
  Organic Chili Fertiliser
  50 Coir Pellets
  Dibber
  Indoor Greenhouse
  18 Terracotta Plastic Pots 9cm
  Heating pad, 35 x 25cm


